Configuring renewal notice types and printer settings

Specifying the kind of renewal notice you wish to send is a two-step process. First, the renewal type for the list must be determined, and then second, the printer should be configured to match the type of renewal being sent. These steps are only required the first time renewal notices are printed, or any time the type of renewal notice is changed.

To select the renewal notice type for an Interlink Circulation list:

  1. Open the desired Interlink Circulation list
  2. Select Configure List… under the File menu
  3. Select the Subscriptions tab
  4. Click the Renewal & Expiration Schedule button
  5. Click the Notification Report Style drop-down and select the desired option
  6. Click the OK button to save your changes
  7. Click the OK button again to exit Configure List

Once the renewal notice type has been selected, the printer must be set up to match that notice type.

When printing renewals on continuous feed 4 x 6 post cards:

  1. Select Configure Printers… from the File menu
  2. Select the Renewals tab
  3. Select the destination printer from the Printer Name drop-down.
  4. In the Page Layout drop-down, select Postcards, 1up, 4×6, perforated
  5. Uncheck the box next to Preview before printing as this will not work with a high-speed advanced driver
  6. Check the box next to Advanced Driver and select your printer from the drop-down
  7. Click OK to save your changes

When printing mailing labels:

  1. Select Configure Printers… from the File menu
  2. Select the Renewals tab
  3. Select the destination printer from the Printer Name drop-down
  4. In the Page Layout drop-down, select the option that best describes your label type
  5. Uncheck the box next to Preview before printing as this will not work with a high-speed advanced driver
  6. Check the box next to Advanced Driver and select your printer from the drop-down
  7. Click OK to save your changes.

If the labels used for renewals are the same as what are used for regular mailing labels, configure the settings on the Renewals tab identical to the Labels tab.

When printing renewals on 3-part invoices:

  1. Select Configure Printers… from the File menu
  2. Select the Renewals tab
  3. Select the destination printer from the Printer Name drop-down
  4. In the Page Layout drop-down, select the top (blank) item to clear the selection
  5. Uncheck the box next to Preview before printing. This will not work with a high-speed advanced driver
  6. Check the box next to Advanced Driver and select your printer from the drop-down
  7. Click OK to save your changes


Keyword: renewal, labels, printer, notice,

Set up promotional rates

Promotional rates are useful when offering new subscribers a special rate for a specified amount of time. These rates are a one-time use rate per new subscriber, meaning once the rate is used for a new subscriber, they will default to the assigned, regular rate, when they renew their subscription.

To set up a promotional rate:

  1. Go to File, Configure List then click the Subscriptions tab
  2. Select the Promotional Rates… button on the upper-left, under Subscription Rates
  3. Click the Add button on the new window that comes up, and that will bring up another window
  4. Set up the promotional rates as you wish and then click OK to save the rate and close the window
  5. Click Apply and then OK on the remaining two windows to save the changes and exit the window

Your promotional rate is now set up. You will choose this rate on the PAYMENT tab, where you enter the customer’s payment.

When this subscription expires, the subscriber will default back to the original rate that was set up when their file was created.

To use the promotional rates:

  1. Add new subscriber and enter name and address information
  2. Place them on the regular rate (for example, In-County)
  3. When accepting payment, drop down the Promotional Rates list, and choose appropriate rate
  4. Enter the paid amount
  5. Click Apply and Ok to exit the payment window and return to the subscriber payment window
  6. Click Ok to save and close


Keywords: Rates, promotions, promotional, special, intro, introduction

Configuring Circulation to group together all PO Boxes

An often overlooked detail of PO Boxes is that they are split into multiple, logical sections in the post office, similarly to how city and rural routes are split. This can be the case whether all of the PO Boxes in the post office are in a single contiguous block, or whether they’re physically split into multiple areas. We refer to these splits as “box sections” or “PO box routes”, which are represented as B001, B002, etc.

Due to the way these are split, there is an increased chance there will be fewer than the required 6 pieces going to a particular box section, and as a result, some of these pieces may be placed in a 5-digit or fewer container causing them to be sorted less optimally, often being sent out of town before returning at a later date.

To combat this, many Post Offices prefer the mailer combine all mail going to PO Boxes into a single PO Box route, B001. As this is against the DMM rules, Interlink Circulation does not handle this automatically, however it can be configured for the Post Offices that request it.

How to force all PO Boxes for a zip code together:

  1. Select File then Configure list
  2. Select the Periodical Mail, or Standard Mail tab (depending on the publication type of your list)
  3. Click the Customize Sacks and Tubs… button
  4. Select the B001 tab
  5. Click the Add… button
  6. Enter the 5-digit zip code of the Post Office where the box sections should be collapsed into one
  7. Click the OK button
  8. Repeat steps 6 and 7 as necessary
  9. Click the OK button
  10. Click the OK button again to save your changes

This change will take effect after the next issue is closed.


Changing the subscriber list headers to display alternate information

When using Circulation, you may decide you want different information to appear on the subscriber list, such as email address, CASS status, company name, etc. You may select these options, highlighted in yellow, from the main menu.

To reset the rows back to the original, default setting, simply go to View > Reset Subscriber Grid Layout and the subscriber screen will return to the default view.

default view

Interlink Circulation updates and releases

Interlink regularly releases new versions of Circulation that include postal updates and feature enhancements.

It’s always advised you install the most recent version of Circulation, as not doing so could have adverse effects on your mailing and may cause concern with your local post office.

You can easily install the latest version in several ways:

While working within the Interlink Circulation program:

  • When a new version is released, click ‘YES’ when the automatic update prompts you, and follow the steps for installation.

Or…

  • Open Interlink Circulation, go to | Tools | Download Program Updates… and follow the prompts.


If you are not working within the program but wish to download the latest version:

  • Visit www.ilsw.com/downloads and under the heading Interlink Circulation Official Release, click the Download Now button.

Or…


While we don’t anticipate problems in downloading from the links provided above, you may use one of our alternate download locations if needed:

Alternate Download Site 1          Alternate Download Site 2


Please do not hesitate to give the Client Solutions team a call at (888) 473-3103 with any questions.

Print a list of expired or expiring subscribers

Provided below are instructions on how to print a list of expired or expiring subscribers:

Using a Call Back List

  1. Click on Reports
  2. Click the Current Reports tab
  3. In the Categories section, select Renewals
  4. In the Reports section, check the Call Back List box, and click Print All
  5. Enter a Beginning and Ending date range
  6. Click Continue


Using a User Definable List

  1. Click on Reports
  2. Click the Current Reports tab
  3. In the Categories section, select List Analysis
  4. in the Reports section, check the User Definable List box, click Print All, and then Advanced
  5. Under the Select section, type or use the drop-down options to enter the following data:
    1. Newspaper Status = {2}  End (if you want a list of subscribers within a certain expiration date range use “And” instead of “End”)
    2. Renewal Date => {Enter beginning date range here in mm/dd/yyyy format}  And
    3. Renewal Date <= {Enter ending date here}  End
  6. Click Continue, and Continue again


Everything you ever wanted to know about CASS


What is CASS™ and CASS Certification?
The USPS® CASS (Coding Accuracy and Support System) process enables United States Postal Service customers to reduce delivery problems by matching their mailing addresses to a USPS-provided database to improve the accuracy of their mailing address, 5-digit ZIP, ZIP+4, carrier route, delivery point and eLOT coding. Certification is required of all mailers, service bureaus and software vendors who perform CASS processing or offer CASS processing services. Certification allows the USPS to ascertain that the accuracy of the process meets minimum standards. Interlink has been CASS certified since the USPS began the program. Because Interlink provides a centralized CASS-processing facility and customers send their lists to us for processing, customers are freed from having to perform their own CASS Certification annually.

Why is it important to have all address lists free of CASS errors?
Having a subscriber record with a CASS error in your system could cost you about $5 per year in postal fees and cause delivery delays.

How do I make sure my list has been CASSed?
It is easy to CASS your list any time. From the main Interlink Circulation screen, click on the menu item ‘File’ and select ‘Service List.’ This will begin a process of backing up your list and sending it to Interlink for processing. Upon completion of processing, the list will be returned to you with confirmation that list servicing was successful. Of course, confirm that [x] Service List before closing is checked on the Close Issue dialog, and your list will always be serviced as part of close issue.

How can I find or display the list of records in Interlink Circulation that are bad?

There are two ways:

  1. To get a printout: From [Print Reports] Button / screen, on the right hand side, you will see the CASS Error Report listed. Select the report and click on the [Print All…] button.
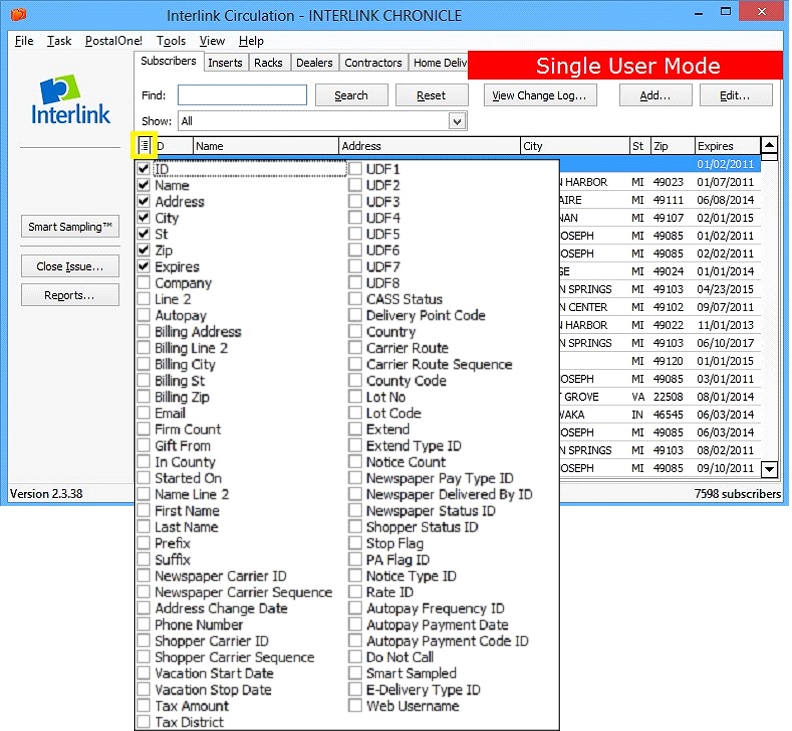
  2. To display the list: From the Subscribers Tab on the main screen, click on the [Reset] button then click the drop down arrow to show either ‘CASS Invalid’ or ‘Active Newspaper with Invalid CASS’. If you wish for the list to be displayed in the same order that is on the CASS Error Report, click on the [ZIP] column header at the top of the displayed customer list.


What does Interlink Circulation need for my subscriber addresses to have a good CASS Status?
Simply put, it needs to have an address that matches what the USPS systems have on file as a deliverable address. The actual deliverable address is established by the local postmaster. The fields that CASS looks at are the Address Line(s), City, State and ZIP code. A 5-digit ZIP code is sufficient, as CASS will add/correct the +4 portion. The parts of address lines are identified as follows:

  • Primary Address number: this is the structure or building number ( 400, 1285 )
  • Pre-directional: commonly a point on the compass (North, East, Southwest )
  • Street Name: as used by USPS for that ZIP code (Main, George, State Highway 34, County Road 86, etc.)
  • Suffix: the road type (Blvd., Ave., Road, St., etc.)
  • Post-directional: similar to pre-directional (NE, South, W)
  • Secondary Address identifier: a sub-unit of the preceding information ( Apt., Lot, Suite, Trailer)
  • Secondary Address: (5, 254, A4, 9D)

Using all the above pieces of information, an address could look like the following:

John Doe
4206 North County Road 32 South Suite D8
Yourtown MI 49123


How do I find the correct information to fix the bad records?
Because there are multiple types of problems, there are several ways to correct the errors. In general, it is better to spell out the entire street name or other parts. We have seen the same county road that traverses across three ZIP codes spelled three different ways — ( 12593 CR 4 – 7856 Co RD 4 – 45392 County Road 4). All three would be corrected if the street had been entered as County Road, but only one would have been good if CR had been entered for each of the addresses.

  • Double check the address visually. Search for other addresses that have the same street name. Sometimes something as simple as a space is missing between parts of the address and thus it does not match (247S Main Street should be 247 South Main Street).
  • Phone books – even though they may not be genuine USPS addresses, they are a good start to verify that you are on the right track with the road name.
  • Use Web resources, including USPS ‘ZIP Code Lookup’, Whitepages.com, and even Google Maps. See ‘Using Websites…’ below.
  • Call your customer and have them read the exact address that is found on their utility bill. (Utility companies have multiple reasons to have an exact address, including emergencies).


What do I give my postmaster to show that the list has been CASS processed?
The 3553 (CASS) Report found in the print reports area of the Interlink Circulation System. The CASS Error Report can be used to assist in the identification and resolution of addresses, and may be helpful for your postmaster to assist with the addresses you are unable to resolve. You may wish to write the subscribers’ names next to the addresses on the CASS Error Report to assist you and/or the postmaster.

Do I have to service the entire list to verify just one change or new address?
No. If you want to verify that the address is good before moving on to another task, simply edit the subscriber in Circulation and click the CASS button and the Circulation program will check the CASS status.

Alternatively you can go to Interlink’s CASS Lookup page and enter the address and 5-digit Zip code and click on the [Check] button. The results will be displayed above the information entered with the Zip+4 and Mailing Information. If there are blanks in the LOT Number and Delivery Point information, you are close, but not exact. These kinds of errors show in the program as a yellow ‘light’ with a ‘No DPV’ Error (No Delivery Point Validation).

Using websites to assist you in resolving CASS Errors:
Several websites are listed below with basic hints and instructions on how to get the best results for resolving CASS Errors. Many other websites may be helpful to you as well, so feel free to find what works best for you.

USPS ZIP Code Lookup:
Even though this does not appear very helpful at first glance, there are several ways that partial information can be used to tease out the additional needed information. The basic rule of thumb here is to approach it from a street name only to see if something can be found to verify that you are on the right track and have the basic information needed.

HINTS:

  • Even though the screen indicates that it requires Address 1, City and State fields to be populated, it will actually work with just the Address 1 and ZIP Code. (Example: Address: N Main; ZIP: 49103)
  • Using only the Address 1 and ZIP Code fields also provides confirmation that the road name is known in that ZIP code. This, of course, means that you have to be reasonably close. But computers being computers, it will not know the difference between Reed and Read.
  • When working with a street that has an abbreviated form (Co Rd), spell it out completely (County Road). The reason for doing this is that even though it may be the same road ‘name’ throughout the county, and it crosses several ZIP codes, the respective postmaster for each ZIP may have encoded it differently (CR or Co Rd. or County Road).
  • When working with directional information, such as N, NE, E or SE, start by omitting them. This may reveal that the structure number of concern is only on one direction or end of the road and not the other.
  • When being presented with more than five results, simply click on the ‘Show All’ option to see the complete list of entries, this will allow you to scroll through the list looking for the general and specific structure number.
  • Once you have a listing of similar Matching Addresses, look carefully at the address numbers as well as any secondary information that would either eliminate or confirm that the numbers are correct.
  • The results display the exact spelling of the road name and the valid ranges of both addresses and secondary information. For example, let’s assume the subscriber provided “2352 River Drive Unit 15” and the Website provides “(Even Range 2300 – 2399) River Drive” and does not have anything after the word Drive. However, further down the list is an entry that says “3252 River Drive Lot (Range 13-22).” You probably can assume that either there was a data entry transposition from 3252 to 2352 and that there should not be a “Unit 15,” or, what is more likely, both a typographical error and what the subscriber calls “Unit,” the Post Office calls “Lot.” Thus “2352 River Drive Unit 15” is supposed to be “3252 River Drive Lot 15.”

White Pages:
This is a good resource for verifying or finding a given person’s general information that can give you clues as to the exact address that you are looking for.

  • Simply enter the First Initial, Last Name and ZIP code for the site to display the results.
  • Scroll through the results to see if you find a match, and then look at the details to decide what may be needed for the address to work with CASS.
  • Once you have verified it with the ILSW or USPS websites, enter the information into the Interlink Circulation customer record.
  • WARNING: most, if not all, of the Sponsored links displayed require payment for complete reports – this is not the area in which to be exploring, unless you really want to pay for something you may not need.
  • Because some addresses are better known by the spouse’s name, you may wish to leave off the first initial field to find a result for an address on a similar road name.

Google maps:
When using Google Maps, enter what you know about the address (not the subscriber’s name). Pay close attention to the road names. It is not at all uncommon for a road to have multiple names for a given stretch, especially when a highway joins and/or leaves a stretch of road for a short distance. This also happens when a road passes through different jurisdictions. As an example, it may be State Highway 23 until it passes into the township. It may then have a different road name which changes at a slight bend in the road as the traveler would then enter into the village or town limits also changing the road names once again. Look for similar spellings and directional indicators as well to help you put the details together when verifying at the ILSW or USPS websites.

Remember, with a little diligence, an accurate address will not only save money in postal fees, but it also will make things go smoother at the Post Office as well as get the paper to the customer with minimal delays.

Happy CASSing!


Test Intelligent Mail barcodes (IMb)

You will need a MID (Mailer ID) which is described in detail here: https://ribbs.usps.gov/index.cfm?page=intellmailmailidapp

  1. Open your list in Interlink Circulation, and go to File, then Configure List
  2. Click on the Periodical Mail (or Standard Mail) tab, and click the Contact Information button
  3. In the Publisher tab, enter your Mailer ID if you know it, or 987654321, then click OK
  4. Close an issue to generate labels with a barcode
  5. Print your Periodical (or Standard Mail) Statistics Report and find a sack that has SCF, MADC, or OMX
  6. Find a bundle with a low number of labels in it by looking at the label column for the bundle
  7. Note the number in the Package column
  8. Go to Reports, check the Periodical (or Standard) Mailing Labels in the Mailings tab, and click Print All
  9. At the top left enter the number in Step 5 next to “Bundle # to Print. Leave Blank for “All”
  10. Check Print IMb, and click Continue.
  11. To test the barcodes, you can either scan them with an IMb scanner (you can download IMb scanners for your Smart Phone), or take them to your local Post Office and have them scan a few to ensure they are working properly

Please contact Client Solutions at 888-473-3103 if you have any questions about IMb.


Add subscription rates

Currently, Interlink Circulation supports handling up to 20 different rates, each with four separate terms, or lengths of time.

To add a rate:

  1. Select “Configure List…” from the “File” Menu
  2. Go to the “Subscriptions” tab
  3. Click the “Regular Rates…” button (or Promotional, Autopay, etc.)
  4. Click the “Add” button
  5. Give the new rate a name (e.g. In-County)
  6. Give term 1 a name (e.g. 6 Months)
  7. Specify in months the duration of the term
  8. Specify the dollar amount to charge the subscriber for this term
  9. If tax is applicable, enter the amount in the box labeled “Tax”, or enter “0” if there is no tax on your newspaper
  10. Click “Ok”, “Ok” again, and a final “Ok” to close all dialogue boxes and save the newly added rate

If needed, repeat the steps for each additional term you wish to define.

If you wish to edit an existing rate, highlight the rate and click “Edit” and make changes as needed.

Wrong label layout in Circulation

What to do when the number of labels across is not what you were expecting; e.g., 1-up printed but 4-up was expected.

This is caused by an improperly selected page layout in the label printer configuration. To correct the layout:

  1. Select “File” then “Configure Printers…”
  2. Click the “Labels” tab, or “Renewals” tab if printing renewal labels
  3. From the “Page Layout:” dropdown, select the correct page layout option*
  4. Click the “OK” button to save the changes.

*If the desired page layout does not appear in the drop-down, consider changing to a supported page layout or contact Interlink to request a quote on the development of a layout that will suit your needs.

Alternatively, Interlink offers many options for label stock that have been tested and guaranteed to work with existing layout options.