Assigning a different subscription rate for an alternate address

Interlink Circulation will automatically adjust the rate of consumption on a subscriber record based on the rate assigned for each address – primary and alternate. That is to say you can have one rate assigned to the primary address on a subscription, and a second rate assigned to the alternate address on a subscription. When the address is changed from one to the next, the associated rate will also change.

To set the alternate subscription rate:

  • Open the subscription record in question, change your view to see the Alternate address, select the alternate rate, and click Apply or OK to save your changes.
  • To confirm the rate change, change the view back and forth between primary address and alternate address, and notice how the rate changes as well.

Circulation also has the ability to recalculate the expiration date when a subscriber moves from the primary address rate to the alternate address rate.

  • Open the Properties Editor, type Recalculate, and set the available property to true. This will recalculate the expiration date based on the new rate and will occur during the close issue process.


Print one or more blank labels between bundles of mailing labels

Provided below are instructions on how to print one or multiple or blank labels between bundles of mailing labels:

  1. Click Reports
  2. Click Current Reports Tab
  3. Select Periodical Mail Delivery/Standard Mail Delivery category
  4. Check the Periodical Mail Delivery/Standard Mailing Labels and click on Print All at the bottom of the window
  5. In the Report Questions window under the Label Settings column, change the number of Blank Labels to something other than 0.
  6. Click on Continue


Change the Post Office of Original Entry (POE)

To change the Post Office of Original Entry (POE), follow the instructions below:

  1. Click File and Configure List
  2. Underneath the Post Office of Original Entry section, remove the old zip, city, and state, and enter the new information for your new Post Office of Original Entry.
  3. Click OK.


Set up for IMb

Using IMb allows you to track letters and flats. When used in combination with IMb Tracing, a free service of the USPS, you will have the capability to track individual pieces of mail through the USPS Mail Tracking website. Although these are two different configurations and services, they are closely related.

To begin using barcodes, you will need a Mailer Identification (MID) number from the USPS. Once you have obtained a MID, then you will want to enable barcoding in Circulation:

barcodedmailing

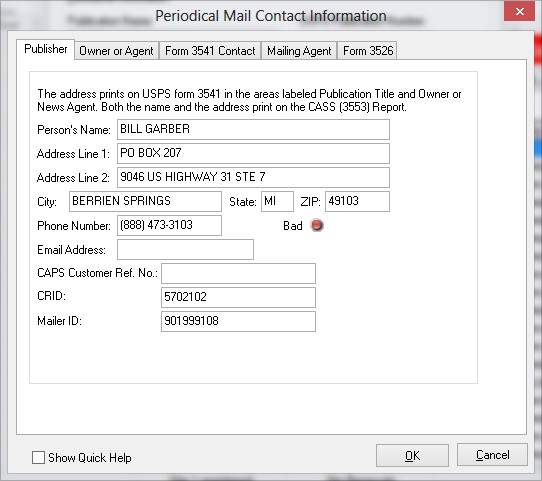
  •  Then, under Periodical Mail > Contact Information, type in your Mailer ID (MID) number and click ok.

MIDno
Information from the USPS: https://ribbs.usps.gov/index.cfm?page=intellmailmailpieces

If you have difficulty acquiring a Mailer ID using the link above please call USPS Customer Service at 800-ASK-USPS® (800-275-8777).

Understanding the Delayed Newspaper Start banner

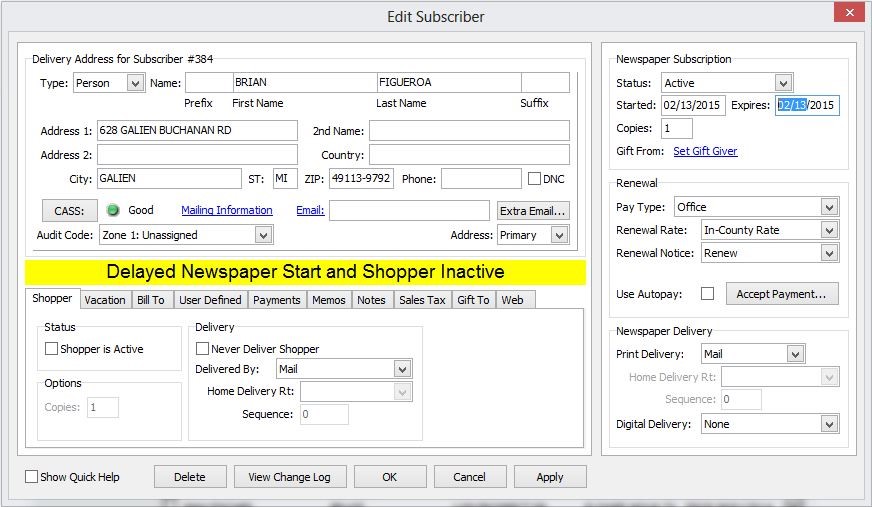
The ‘Delayed Newspaper Start’ was created to advise of a subscription that will not start until you close an issue past their start date.

A delayed start can be a new subscriber recently entered or an expired or inactive record that is reactivated (either manually or with the entry of a payment).

To remove the Delayed Newspaper Start flag notification, you will have to close an issue that is after their beginning date, which is reflected in the newspaper area on the right-hand side.

 
Delayed Start Flag removal


Registration information for Circulation

Registration within Interlink Circulation is required as a security measure in order to ensure your subscriber information remains private. Registration will need to be performed each time Circulation is installed on a new or additional computer.

To obtain your registration information for Circulation, please call Client Solutions at 888-473-3103 to request the information.

Unable to enter a vacation stop date

The most common issue for a user being unable to enter a vacation stop date on a subscriber’s account is that the date format is incorrect.

The program requires the date to be entered with a mm/dd/yyyy format. Not entering the date using this format can result in an error message that may cause the program to close.

Simply entering the date using mm/dd/yyyy format will correct this problem.


Barcodes not printing on labels

There are several reasons barcodes may not print on your labels:

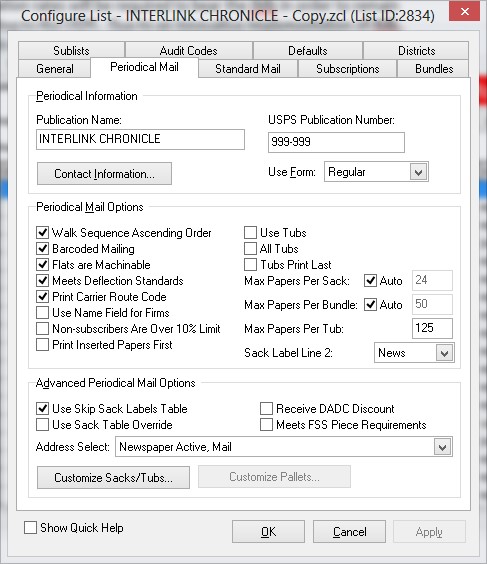
  1. The option to print barcodes is not turned on in File | Configure List. The result of this is that no labels will have any barcode on them. The box for Barcoded Mailing must be checked in order to have barcodes printed on your labels.Barcoded Mailing Screen capture2
  2. Barcodes will not print if the package does not need barcodes – CAR-RT LOT, CAR-RT WSS, or CAR-RT WSH will not have barcodes on them because the bundle goes straight to the carrier.
  3. Printer Setting Misconfigurations could be an issue. If the wrong advanced printer driver is selected, or the advanced driver box is not selected when it should be, this can result in issues not printing barcodes.
  4. The printer is incapable of printing barcodes (unsupported printer). Printers that are known and verified to support barcodes are available from Client Solutions.

Check each of these areas: Print Preview or the Statistics report will indicate if Interlink Circulation is attempting to generate a barcode for specific labels and/or bundles.

Note: Barcodes are only printed for packages requiring them in order to speed up printing and save your printer consumables. At the minimum this means you won’t see them on ECRLOT and WSS/HD packages.

Additionally, many post offices without automation capable equipment in their local office will automatically send all barcoded mail upstream to the SCF or ADC to be read on the barcode reader, causing significant delivery delays.

To configure your list to print barcodes:

  1. Open your list in Circulation
  2. Go to File > Configure List
  3. Click Periodical Mail and then under periodical mail options, ensure the Barcoded Mailing box is checked.
  4. If the mailing meets deflection standards, be sure that box is checked as well.

Changes will take effect the next time you close issue. If you were expecting to see barcodes on your current mailing labels and needed to make the above changes, it is necessary to roll back your list first and then make the above changes.


Change the close issue date

Summary

Interlink Circulation automatically increments the Issue Date on the Close Issue screen for the next issue to close, based on a user-defined schedule. That schedule determines the frequency, and day(s) of the week that the list is published. Although the list will always operate based on this schedule, there are several reasons the Issue Date, when closing an issue, may differ from what is expected:

  1. The date is for a different day of the week than when the publication is released.
  2. The list was restored from a backup, and is now operating from the point-in-time when that backup was taken.
  3. The list was rolled back, but never re-closed afterward.
  4. The list was repeatedly closed, perhaps for testing purposes, inadvertently advancing the schedule into the future.

In most cases, adjusting the Issue Date to the desired schedule is a straightforward process, as explained below.

Solution A:

If the date is close to what is desired, but does not reflect the proper weekday, adjust the scheduled day(s) of the week as follows:

  1. Select Configure List from the File menu.
  2. Click the Newspaper Schedule, or Shopper Schedule button as is appropriate for this publication.
  3. Uncheck the incorrect days, and check the box next to the desired weekdays.
  4. Click the OK button to save your changes.
  5. Click the OK button to exit Configure List.

Solution B:

If the Issue Date on the Close Issue screen reflects the correct day but is too far into the past, it may be necessary to close multiple issues to get “caught up” to the correct week. This usually happens when one or more issues have not been closed that should have, when the list is rolled back, or when the list has been restored from a backup.

Before proceeding, it is important to ensure that all recent subscriber changes are present in the list – specifically new subscribers, address changes, and payments. If any expected changes are missing, contact Client Solutions for assistance. If all expected changes are present, proceed to close as many issues as is necessary to bring the list up-to-date for the desired Issue Date.

Solution C:

If the Issue Date on the Close Issue screen reflects the correct day but is too far into the future, it is likely that one or more issues have been closed unnecessarily. This may happen when an extra, special issue was published without first adding the additional week day, or when the user goes through the Close Issue process multiple times with the expectation that the same issue is being re-closed again.

When this happens, the list must be rolled back in order to bring the list back onto the expected schedule. Please note that this option is only suggested when the schedule is off by one issue into the future.

To roll back the list, ensure that all subscriber changes that were made since the issue was last closed are available to be re-entered as these changes will be lost as part of the roll-back.

  1. Select Roll Back List from the File menu.
  2. Check the “most recent auto backup” date, to ensure that is the point-in-time you wish to return to.
  3. Confirm the roll back by clicking the Yes button.
  4. Re-enter any subscriber changes that have been discarded by rolling back the list.

If you are unable to roll back, or if the roll back would cause the loss of a substantial amount of changes, you may send the list to Interlink to unclose the issue. To send the list, click on Tools and Send List to Interlink. 

Please call Interlink and notify Client Solutions that you have sent the list to Interlink and you are requesting that we unclose the issue for you.

When your list is ready, Interlink Client Solutions will notify you and instruct you to open the list, and click on the FETCH button.


Keywords: close, issue, restore, date, schedule, configure


Place a subscription on vacation hold

Open the desired Subscriber:

Select the vacation tab:

  1. Enter a stop date for when they no longer wish to get the paper – enter today if they are asking for a delayed start.
  2. Enter a Restart date if and/or when it is known at any time after the stop date has been entered
  3. If the subscriptions expiration date is to be adjusted by the number of days stopped, check the box labeled Extend.

When the issue is closed the stop date is compared to the issue date.  If the stop date is in the past, the record will be stopped.  Once the record is stopped, the system will look at the Restart date in comparison to the Issue date and be restarted when the Restart date falls on or before the Issue date.  The expiration date will be extended if the Extend box is checked when the subscription is restarted.

Note:  This is NOT the way to change addresses when a subscriber moves, or relocates to a vacation or secondary address.  You must first enter the address under the Alternate Address under the edit subscription screen, then enter the date they are moving under the Vacation tab in the Address Change Date box.  This process must be done again when they go back to their primary address.


Keywords: vacation, subscriber, hold, alternate, address, date, extend, restart, delayed